
Its nightime and the lights are out... But you can hear it running! Stock exhaust.
Wednesday, October 10, 2007
Sunday, September 16, 2007
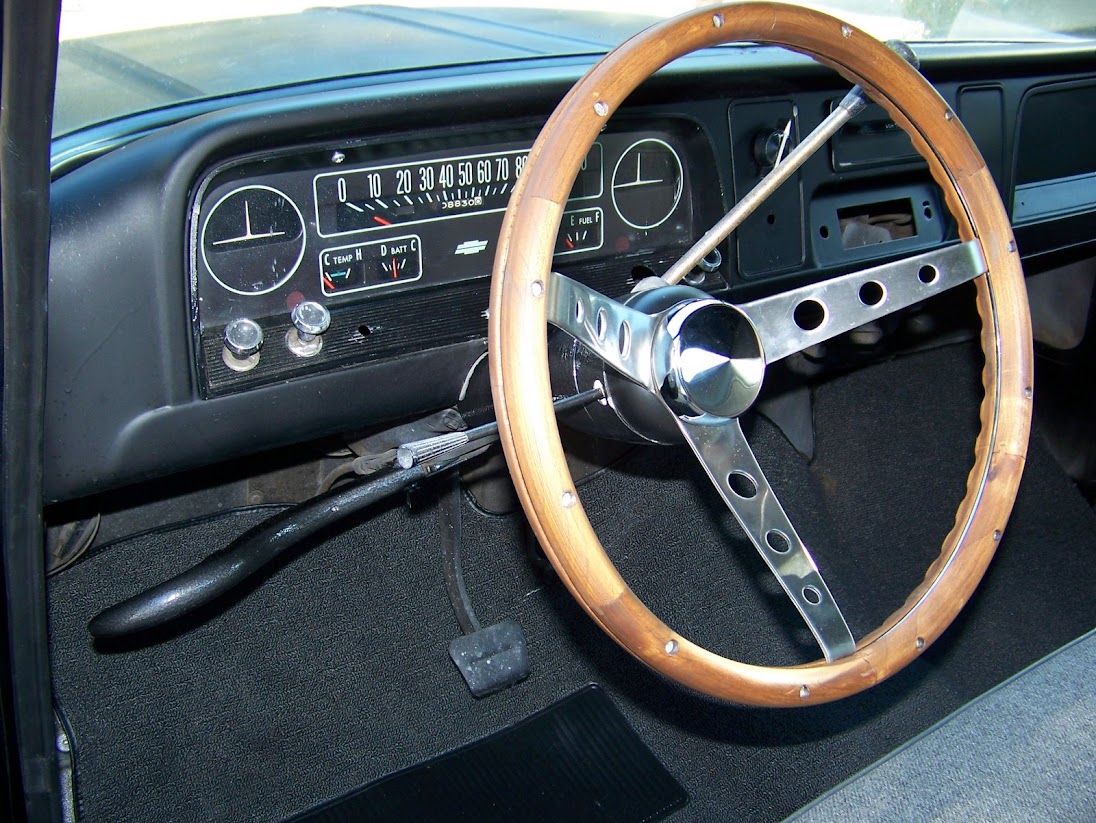
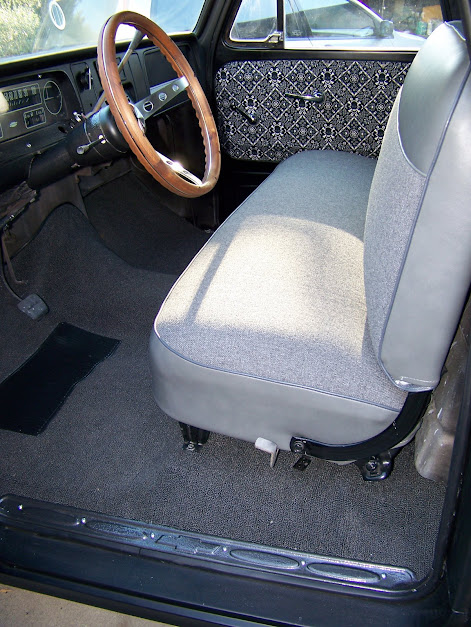
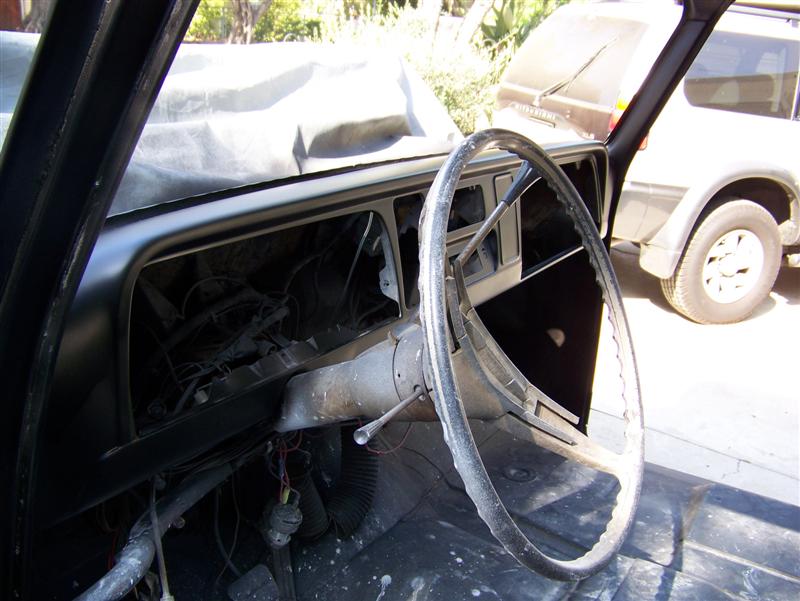
Wood Grain Grippin' / Interior Pics
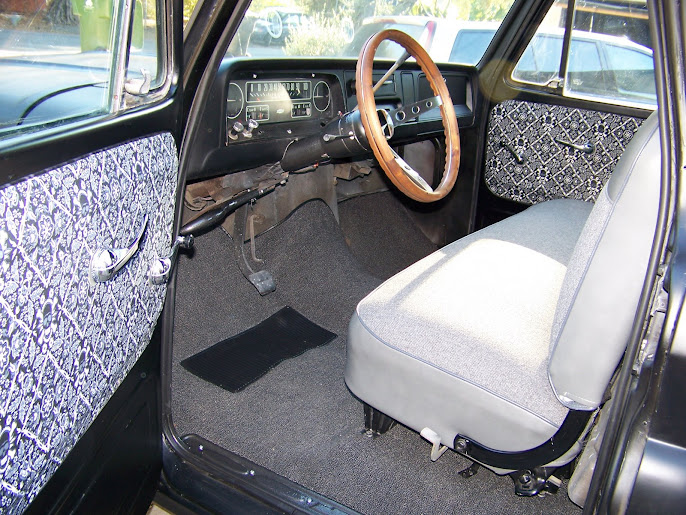
So I finished installing the carpet, seats, and installing both doors. I also put on my new wood grain grant steering wheel! I love it!
I also found some pretty cool material (in my opinion) at the fabric store. I put it on my door panels and it will also be on my sun visors soon, but my wife don't have time to sew'em up for me...errrrr!
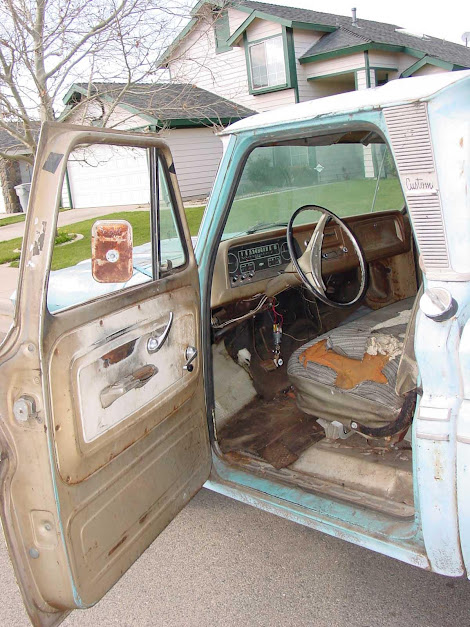
Here are some before and after pics.
- AFTER -
----------------------------------------------------------
- BEFORE -
- AFTER -
----------------------------------------------------------
- BEFORE -

- AFTER -
----------------------------------------------------------
- BEFORE -

- AFTER -
I also found some pretty cool material (in my opinion) at the fabric store. I put it on my door panels and it will also be on my sun visors soon, but my wife don't have time to sew'em up for me...errrrr!
Here are some before and after pics.
----------------------------------------------------------
- BEFORE -

- BEFORE -
- AFTER -
----------------------------------------------------------
- BEFORE -
- AFTER -
----------------------------------------------------------
- BEFORE -
- AFTER -
----------------------------------------------------------
- BEFORE -
- AFTER -
Monday, September 03, 2007
Wiring Diagrams
1965 Wiring Diagram - Engine Harness - V8 w/gauges (color)

Just want to add, if you like this colored diagram please leave +rep comment. It took me some time to create it, I'm not a photoshop pro! :)
*click to enlarge

Just want to add, if you like this colored diagram please leave +rep comment. It took me some time to create it, I'm not a photoshop pro! :)
*click to enlarge
Monday, August 13, 2007
Passenger Door Installed
Well, it was VERY tough to install the door solo. It is not properly aligned yet but I guess I will do that when I have some real help over. The door opens and shuts but to open it takes a good tugging. It is catching on the pillar latch cuz its sagging about a quarter inch too much. Believe it or not but a 1/4" adjustment by yourself is pretty tough, even if you do have a jack under the door! HAHA.
Oh well, until next time (driver door)...


Sunday, July 15, 2007
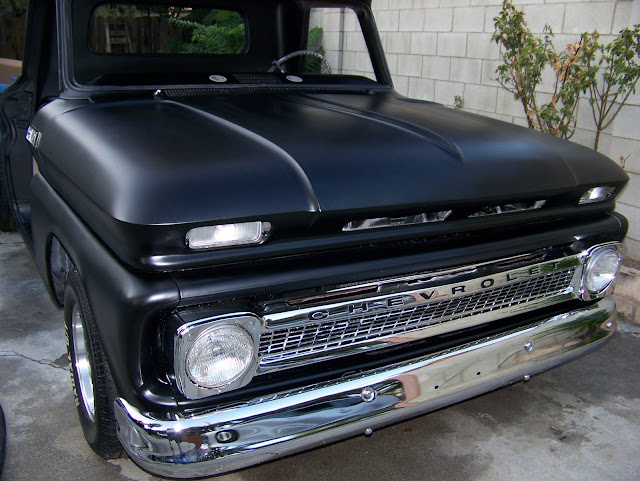
boyz in da HOOD!!
Yep, you guessed it. I got the hood painted and installed! Granted all might panels are not aligned properly, I think it still looks nice. I will wait to align everything once my doors are installed.
I painted the underside with some rustoleum hammer finish (update pics to follow). Rolled it on and brushed in the tight spots. Hopefully it holds up with my engine heat.
Note to self: While installing a million pound hood that you and your friend are holding up, DO NOT ask your wife if she can help with putting a bolt in and screwing it. She just might lean over and get a cramp right as she gets the bolt in place... thus dropping the bolt down into the engine bay. If you do think you might have to ask your wife for a extra hand make sure you have her warm up first. :)
Bumper Instalation

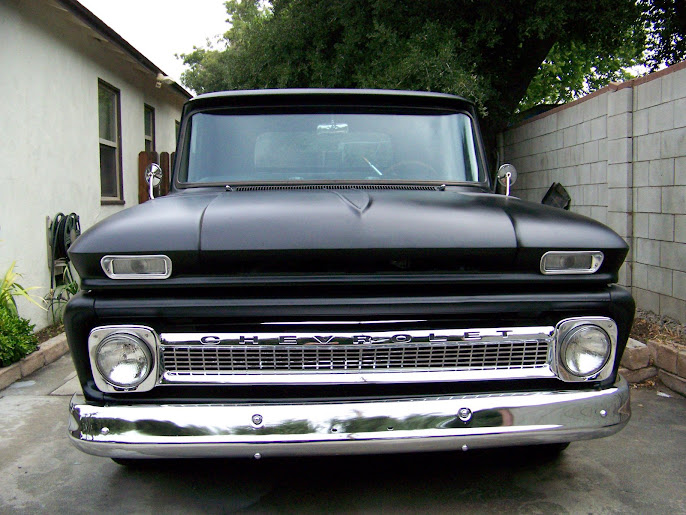
SO HAPPY! My bumper is installed!!!! I have to say... it does look like its starting to come together now.

I also installed my driver side fender, driver side cowl panel, upper cowl panel, headlights and bezel!
Check it out, let me know what you think!

So different from how it looked when I first got it!

Wednesday, July 11, 2007
Chillin' and Grillin'

* Note: This is the beautiful princess photographer that helped make this tutorial/blog happen.

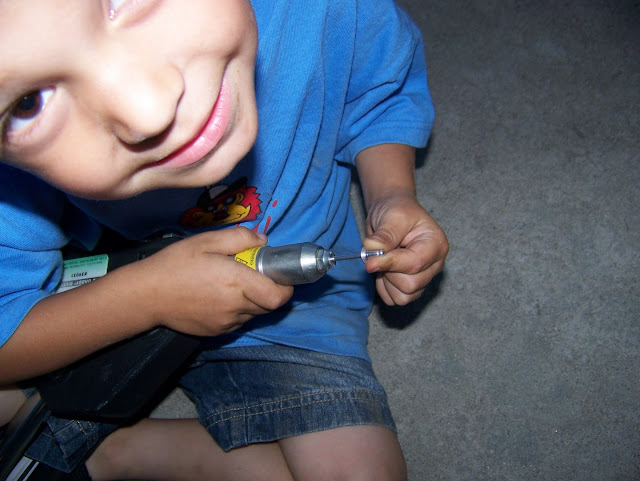
** Note: This is the handsome stud riveter that was used in the process. He is professional, safe, and knows excactly what he is doing.
SO HERE IT GOES!
I'm so pumped up! Just got the grille installed with the help of ma boy and daughter! He is and excellent riveter and she takes some excellent pics! Check it out, this is how I did it incase you need help with yours.1. first remove grille and disassemble headlights and hardware from old grille. The old grille can be removed by three bolts located behind the radiator/grille support panel, located inside the fender well.
2. Rivet holes on the original grille are 3/16" so I started with a slightly smaller drill bit. I made pilot holes through all the rivets (4 per side, 2 in middle) which did not quite knock out the rivets. So I finished them off with a full 3/16" drill bit. They all came out very easy and the pilot holes made it even easier.


3. Next I cleaned up, primed, and painted my headlight buckets. They are not too visible so I wasnt much concerned with the looks, just that they are a fresh black.
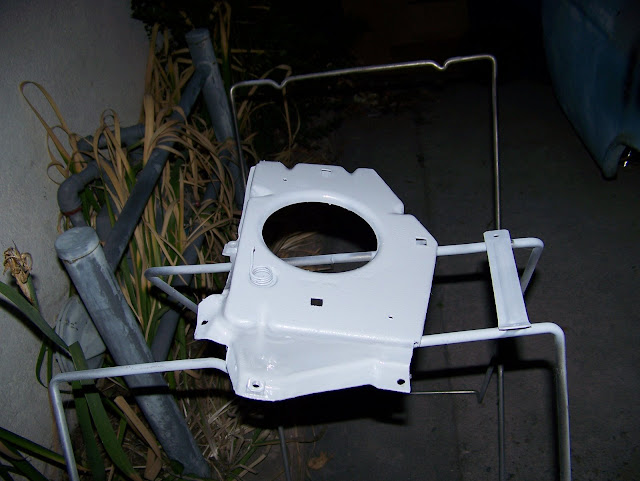
4. after the paint was completely dry, I begin to mount the headlight buckets into my NEW grille! First fit it in to make sure you have the correct ones on each side. I dont believe they will fit opposite. I used 3/16" diameter aluminum rivets with a gripping range of 1/8". These work PERFECT!

*rivets used
-----------------------------------------------------
*how to insert rivet into gun. Needle side in gun.
-----------------------------------------------------

* I found it easier to place the rivet head into hole first, then into the gun.
-----------------------------------------------------
5. Next get a strong 3 year old to pump those rivets in while you hold the pieces together! Again, there should be 4 rivets per side and a middle support bar. My NEW grille came with two middle support bars so I also riveted those in.


6. Next is the fun part! Bolt the grill back into place! Now you can either sit back and enjoy the new bling on your truck... or you can be pissed off because the shop provided only screws but no U-Clips to bolt on your new headlight bezels.

Sunday, July 08, 2007
The Learning Curve - Painting Improvements
Well... I think I'm getting the hang of it! I went to my friends paint shop and he showed me how to set up my gun better and how to get better strokes. I experimented using his technique on my cab cowl panels and I like the results! I even put on my emblems just to see how it looks.

I also finished my fenders and grill support with results that I am happy with. I will post pics soon. I REALLY need to get the doors done so I can start the inside interior work (carpet / seats).
I cant wait until I can start hanging and aligning all my body panels! I'm sure it will be a real pain in the A$$!
Sunday, June 24, 2007
Cab Painted with Hot Rod Flatz Black
Well after a very long time of prepping the cab and much anticipation of getting some paint on it, It all ended with some slight disappointment. I had some heavy striping effect and fisheyes on some areas. I WILL fix these areas. To top it off, my compressor broke when I accidentally knocked it over. I WILL fix that also :) Anyway, here are some images.


Sunday, June 03, 2007
CAB PRIMERED UP

Today I was able to finish off removing the rest of the paint, got the doors off, prepped door jambs, and finished body filler work. Needless to say it was an ALL day task and I am super SMOKED!! It was very rewarding in the end however because I got to lay down my first coat of etch primer. This should take care of any corrosion for now.
Did I forget to mention the troubles I had getting the door check released? LOL... I tried everything BUT tapping the roll pin upward.
So here are the pic of the cab in primer.


Wednesday, May 09, 2007
WOKE UP ON THE WRONG SIDE OF THE BED!
Well, not exactly waking up on the wrong side of the bed, but I did get the bed off the frame today.
Removal went fairly easily. I was anticipating it being much heavier so I had a couple friends (Carlos and Rudy) come over to help and a little BBQ. Rudy and I started on the bolts that hold the bed to the frame. Luckily they were rusted too bad and we were actually able to unbolt them the normal way. No hacksaw needed!


Turned out we were able to get it lifted off with just one of us on each side. We didnt have to use me engine hoist. Carlos showed up and helped us get it on four standard jackstands where it will rest until I can get to it. I have my work cut out for me.
There are only three major body work areas I'm concerned about. Besides filling in 66 body trim holes and still needing a tailgate! Here are some pics of the areas I'm talking about.

Upper bed rail is bent pretty badly. Gotta get this straightend out... Any suggestions? I was thinking about a 2x4 underneath and hammering up??

Rear driver side looks like it was chewed up pretty bad. I'm thinking replacement panel but I don't have a welder nor welding experience.

Rear bed panel is badly rusted at the bottom. I think I'm going to replace this panel with a new one and paint the inside of the bed with some bed liner like Hercules. I should probably just buy a parts bed and get the panels I need (rear bed panel, tailgate, and lower driver side bed panel).
Removal went fairly easily. I was anticipating it being much heavier so I had a couple friends (Carlos and Rudy) come over to help and a little BBQ. Rudy and I started on the bolts that hold the bed to the frame. Luckily they were rusted too bad and we were actually able to unbolt them the normal way. No hacksaw needed!
Turned out we were able to get it lifted off with just one of us on each side. We didnt have to use me engine hoist. Carlos showed up and helped us get it on four standard jackstands where it will rest until I can get to it. I have my work cut out for me.
There are only three major body work areas I'm concerned about. Besides filling in 66 body trim holes and still needing a tailgate! Here are some pics of the areas I'm talking about.
Upper bed rail is bent pretty badly. Gotta get this straightend out... Any suggestions? I was thinking about a 2x4 underneath and hammering up??
Rear driver side looks like it was chewed up pretty bad. I'm thinking replacement panel but I don't have a welder nor welding experience.
Rear bed panel is badly rusted at the bottom. I think I'm going to replace this panel with a new one and paint the inside of the bed with some bed liner like Hercules. I should probably just buy a parts bed and get the panels I need (rear bed panel, tailgate, and lower driver side bed panel).
Sunday, April 01, 2007
Fill The Breeze?
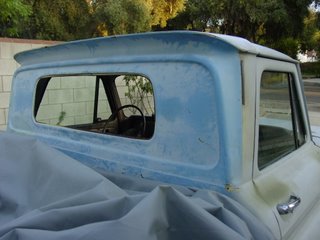
I finally got around to pulling out my windshield and rear window. I needed to do this in order to sand my dash as well as areas under the window gasket/moulding.
Pulling out the windshield was not too hard. Actually much easier then I thought it would be.
1. The first step was to use a slit the rubber moulding all around the outside of the chrome window trim (outside the truck). The blade didnt even have to be especially durable, as in my case I used an x-acto knife without even chipping the blade once.
2. I cut about 2-3 feet at a time and peeled off the moulding. After I did this I can see the edge of the chrome trim and how the trim seated on the window edge.
3. After doing this several times on one side I was eventually able to pull out the chrome trim without bending or ruining it. This is probably not necessary as I later learned that it could have just popped out with the entire window.
4. Now with all the rubber moulding trimmed away you can see the windshield edge. I then had a friend go inside the truck and gently push the windshield outward. He used even pressure with one hand on driver side and the other on the passenger side. I figured this would evenly distribute any stress.
5. After that I held the windshield out until he can come around and help me lift it out!
6. DONE!! Now store the glass upright in a safe location. I chose to store it on 3 2x4's so that it is raised off my garage floor with a thick blanket between them. Then I roped it to my workbench so that it wont fall over.
Here are some pics of how it looks with the windshield removed. I will be sanding and prepping these areas for paint ASAP! I can also get to the dash MUCH easier now!


Subscribe to:
Posts (Atom)


